
To create the background, place a piece of Whisper White cardstock in the Perfect Polka Dots embossing folder and put it through the Bigshot. Now drag the Smoky Slate stamp pad across the Perfect Polka Dots embossed piece. The colour will pick up on the dots and fill in some of the white space between the dots. Just keep dragging the Smoky Slate stamp pad across the embossed piece until you are happy with the depth of colour. You can make the edges darker than the centre if you wish.
The background is now finished (told you it was quick and easy) ready for you to make your card.
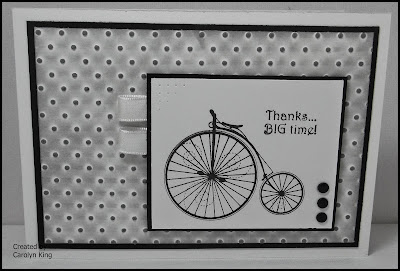
Detailed below are the measurements that I have used on each of the cards. I used a colour scheme of Whisper White and Basic Black, with Staz-on Jet Black Ink and Stampin' Up Smoky Slate Ink. Black Candy Dots and Whisper White Taffeta Ribbon were used for embellishments along with some pierced holes made using the Essentials Paper Piercing Pack, Stampin' Pierce Mat and paper-piercing tool.

Card base - Whisper White A2
Black Mat - 9.5cm x 13.8 cm
Distressed Background - 9cm 13.3cm
White (for image) - 6.5cm x 8.5cm
Black mat - 7cm x 9cm

Card base - Whisper White A2
Black Mat - 9.5cm x 13.8 cm
Distressed Background - 9cm 13.3cm
White (for image) - 6cm x 7cm
Black mat - 6.5cm x 7.5cm
Card base - Whisper White A2
Black Mat - 9.5cm x 13.8 cm
Distressed Background - 9cm 13.3cm
White (for image) - 6.5cm x 7.5cm
Black mat - 7cm x 8cm


No comments:
Post a Comment